Why Is Keystone Correction in a Projector Vital for Home Golf Simulation?
There is a tendency among golf enthusiasts looking to build the golf simulator of their dreams to focus on the specs that most are familiar with when purchasing a projector, such as brightness, resolution and so on, while overlooking factors related to the simulator’s surrounding, such as the dimensions of their room, available spots to mount the projector, the space needed for impact zones, etc. Yet these types of factors can be as consequential on the resulting image as the specs that get all the attention. This is because these factors play a major role in important details like projection range and the problem of shadows. Given this fact, what other features on a projector should someone designing a golf simulator at home pay attention to beyond the most well-known specs? This article will help introduce you to some of the features that are vital to building an effective golf simulator.
What Features Should a Home Golfer Look for?
Compared to launch monitors, the market for projectors offers a wider variety of models as well as a myriad of features all of which may muddy the waters for the unfamiliar, who, as a result, may only become aware of issues related to their projector after they’re already knee-deep in the installation process, issues which could have been resolved earlier in the decision-making process.
What the home installer will find is that beyond having an ideal short-throw range of 0.81 to 0.89, purchasing a projector with robust keystone correction capabilities will ensure that the installation process is painless. This is because keystone correction capabilities give them the ability to correct any issues with the image geometry after completion of the installation process, without the need to disassemble and repeat the installation process over and over until the image is just right.
What Is Keystone Correction?
The keystone effect is the phenomenon where an off-center projection angle causes a projected image to be larger on one or more sides. Keystone correction, then, is the feature on a projector that allows you to adjust the geometry of the projected image to make it fully rectangular. It works by allowing the projector to rotate the angle of the projected light along three axes: X, Y, and Z.
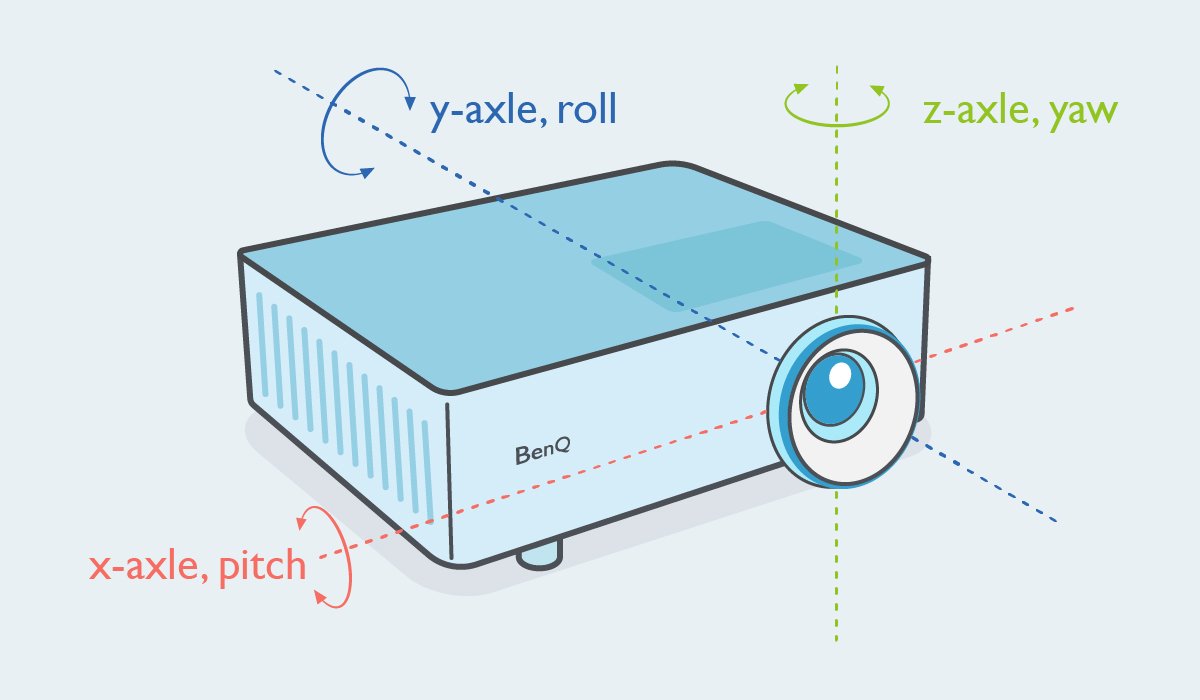
By rotating along the X-axis and adjusting what is called the “pitch”, the projector is able to perform 1D keystone correction, which corrects trapezoidal images where either the top side is wider than the bottom side or vice versa – as seen in the image below.
Almost all projectors on the market include the ability to adjust along the X-axis to perform 1D keystone correction.
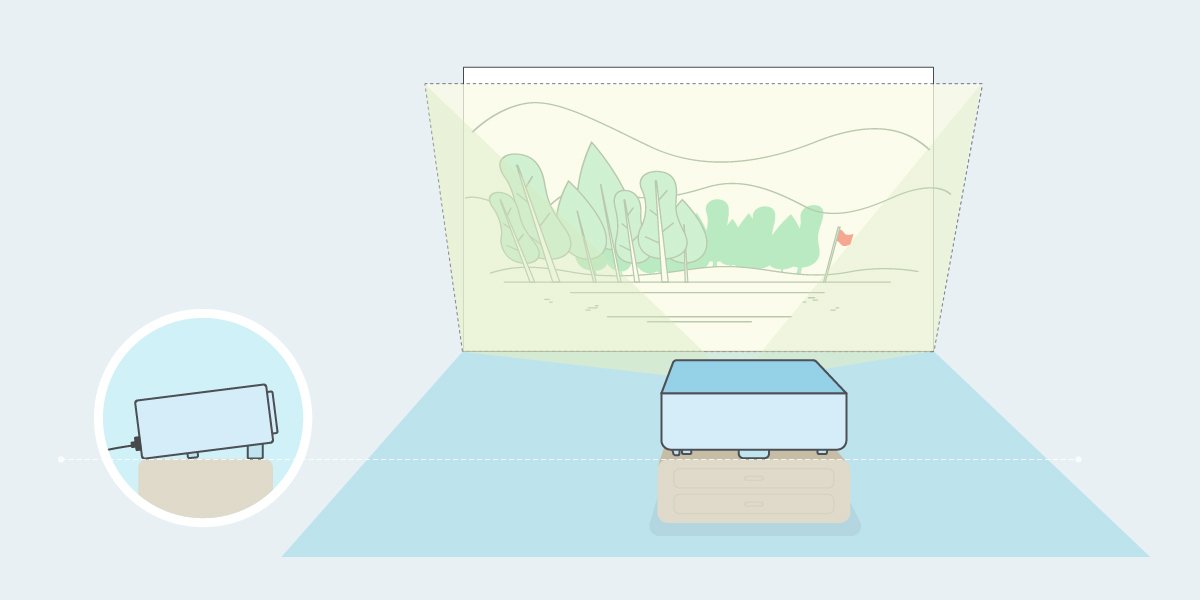
Trapezoid with a wide top side and narrow bottom side
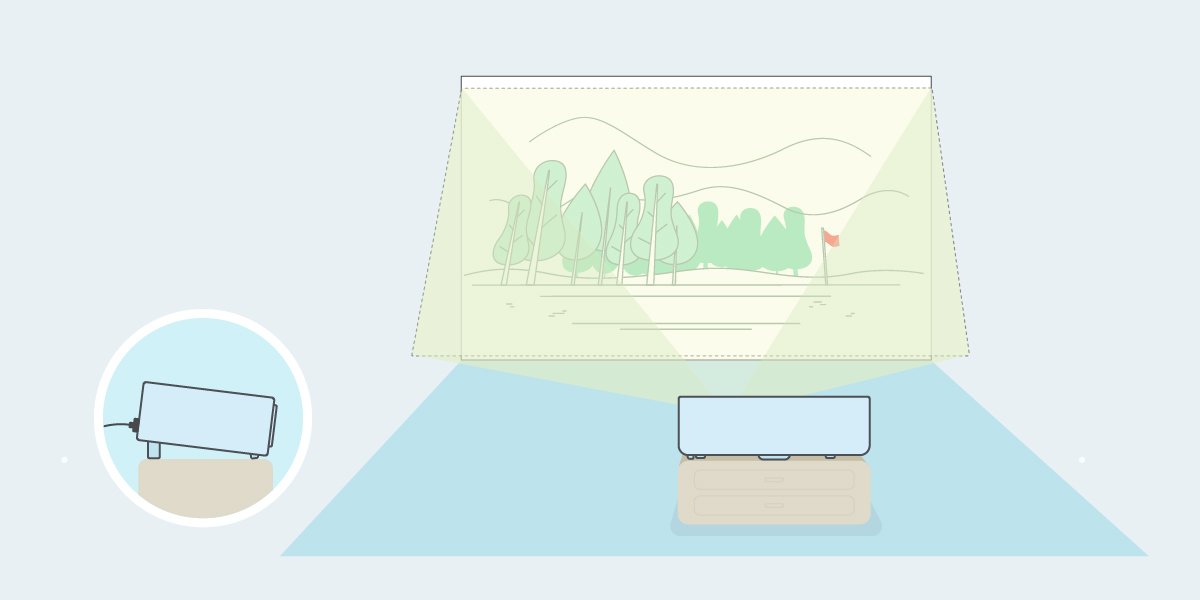
Trapezoid with a narrow top side and wide bottom side
By rotating along the Z-axis and adjusting what is called the “yaw”, the projector is able to correct trapezoidal images where either the left side is longer than the right side or vice versa, as seen in the image below.
The ability to adjust along both the X and Z-axis is known as 2D keystone correction.
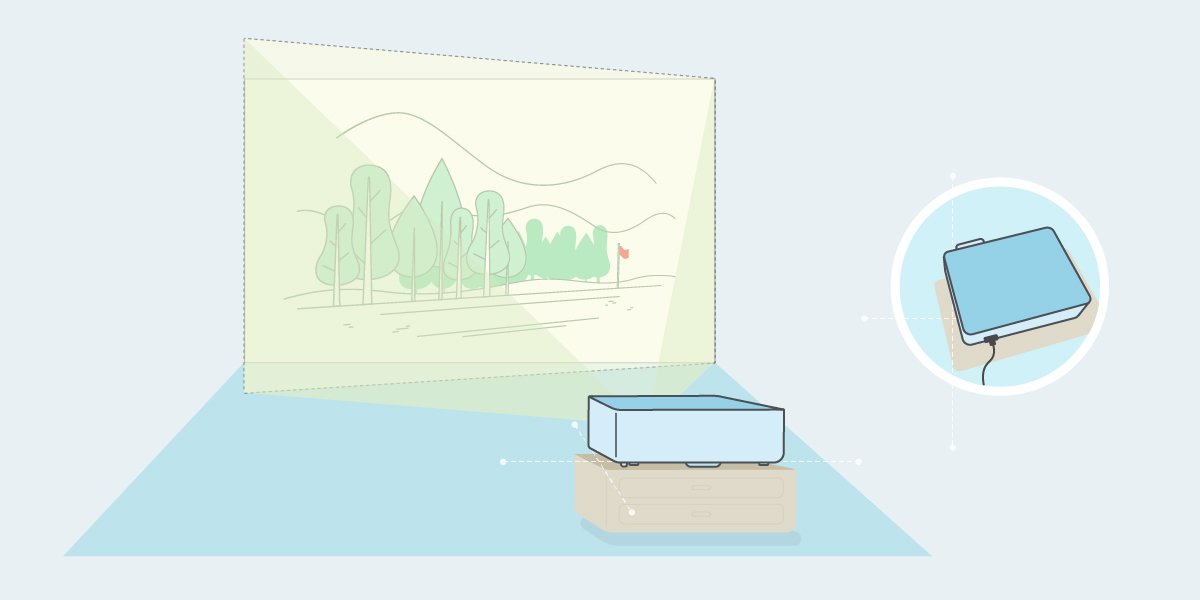
Trapezoid with a long left side and short right side
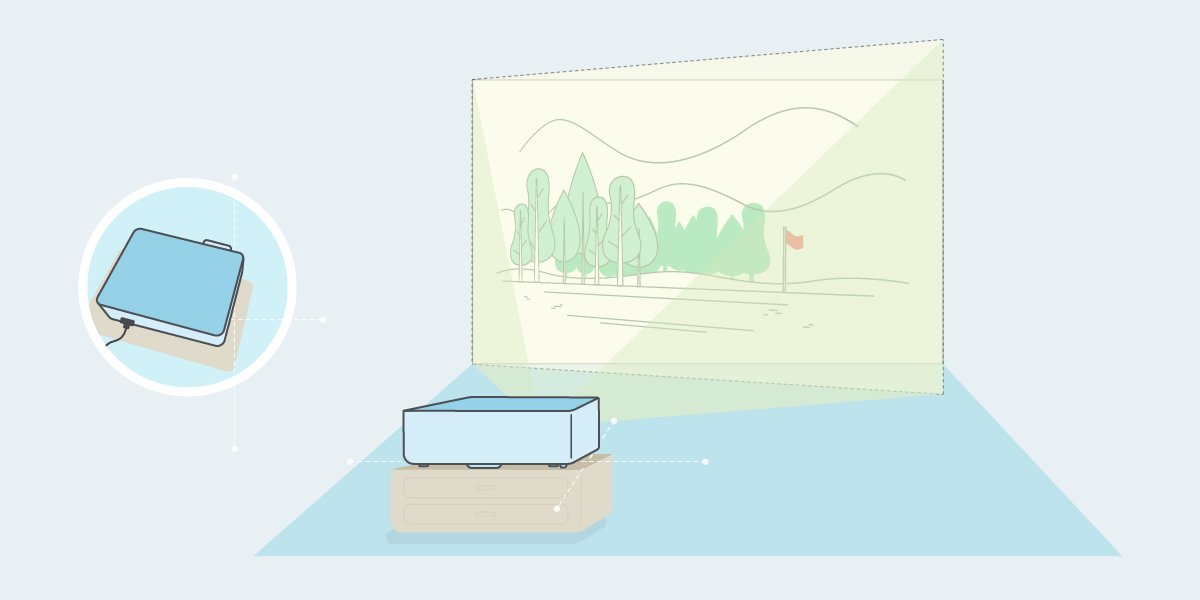
Trapezoid with a short left side and long right side
By rotating along the Y-axis and adjusting what is called the “roll”, the projector is able to correct images with either a clockwise or counter-clockwise tilt, as seen in the image below.
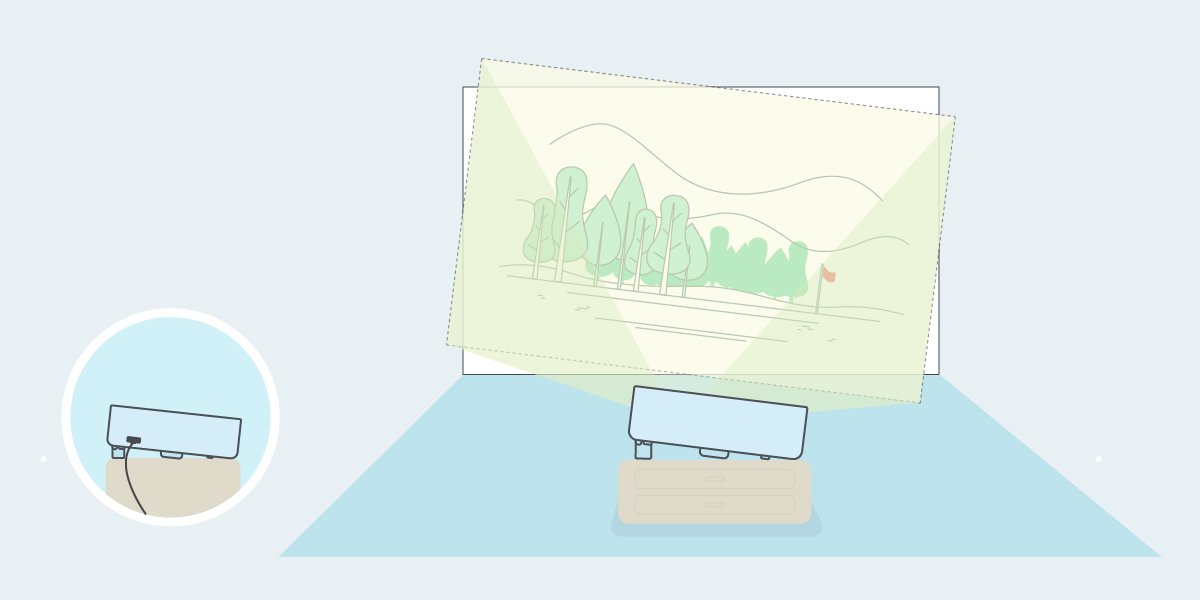
Image with a clockwise tilt
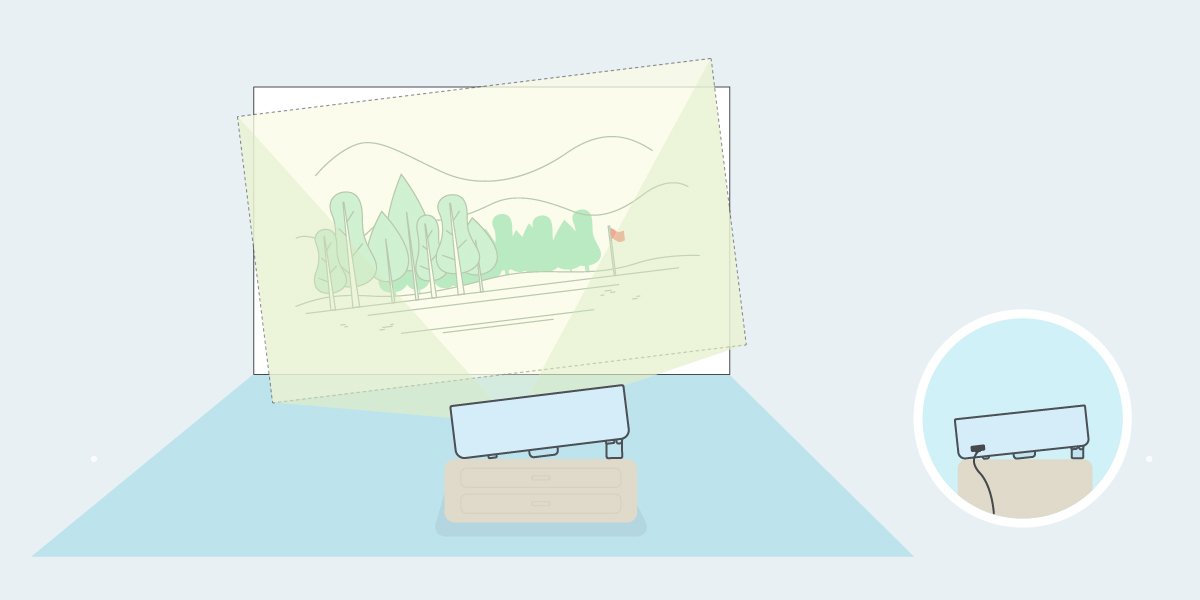
Image with a counter-clockwise tilt
The ability to adjust along the X, Y, and Z-axis is known as 3D keystone correction.
Keystone Correction and Corner Fit
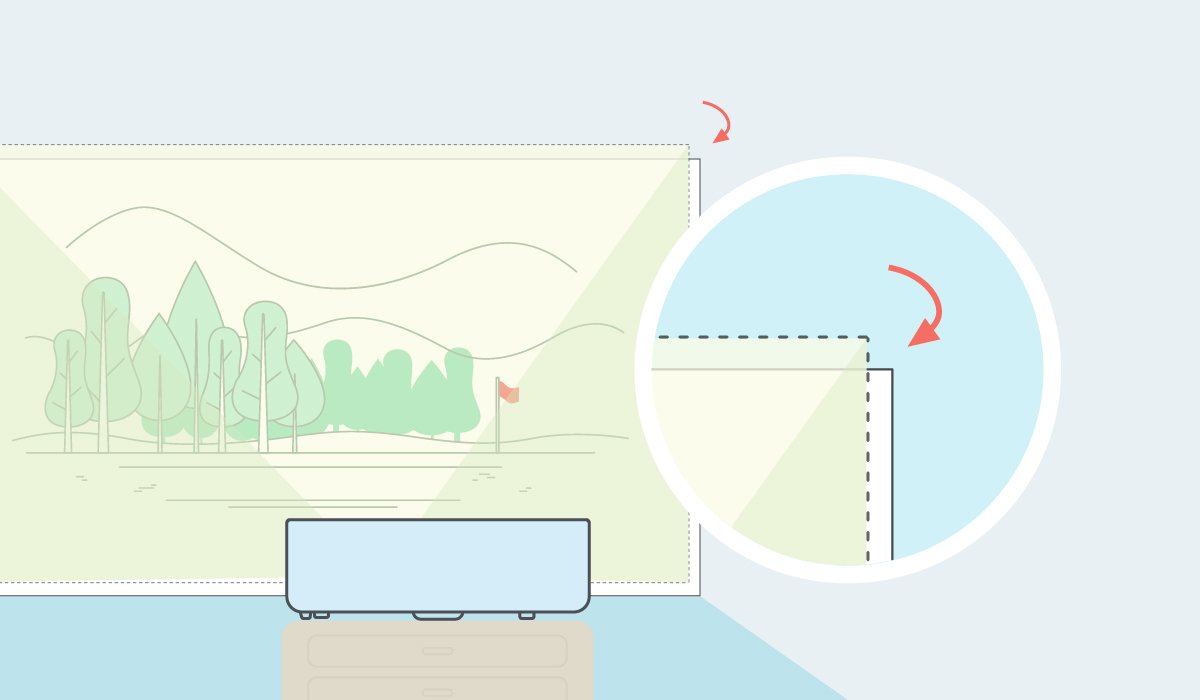
In certain instances, a projected image may still feature distortions even after performing keystone corrections. This is due to the fact that there are a multitude of small details in a projector’s position that factor into the orientation of the three axes, which in turn combines to produce the actual projection angle. Whereas keystone correction is able to correct the most glaring distortions related to the axes, such as the ones described above, a feature such as Corner Fit is needed to be able to make corrections at the periphery of the image.
In the example below an image that has been corrected via Corner Fit is superimposed onto the original image prior to correction. It’s immediately apparent that the top-right corner was able to be adjusted and corrected via the Corner Fit feature.
When Are Keystone Correction and Corner Fit Needed?
The following are examples of the role keystone correction and Corner Fit can play in perfecting your home golf simulator:
Example #1
Steve is a right-handed golfer who wants to mount his projector on the ceiling, but the ceiling is not tall enough for the projector to avoid his swing radius when mounted directly above.
Suggested Solution
Steve should mount the projector on the ceiling but off to the side, away from his swing radius. Then Steve can utilise 2D keystone correction to correct any image distortions, followed by Corner Fit to address any minor distortions.
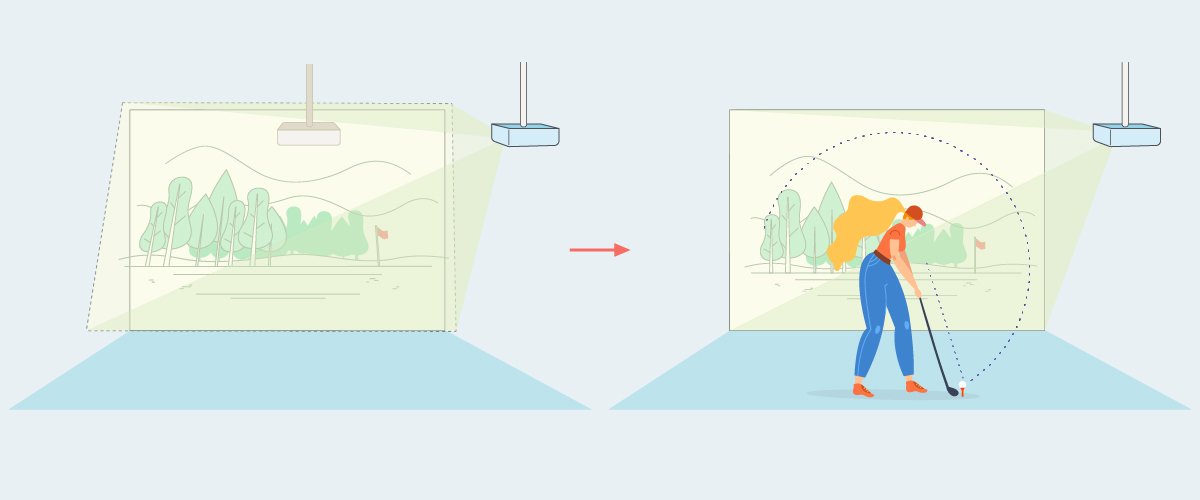
Projecting from the side avoids interfering with his swing
Example #2
Dave uses an AV cart to position his projector because he’s unable to mount it on a wall or ceiling, but he wants to make sure the projector is out of the impact zone.
Suggested Solution
Dave should similarly position the AV cart (with the projector) off to the side and correct the image using 2D keystone correction and Corner Fit. Then once the corrections are made, he should mark the exact location where the cart is positioned so that every time he practices he can easily position the cart in the right place without the need to re-do the corrections. Beyond that, Dave doesn’t necessarily need to use a specialised AV cart, instead any suitable cart with wheels should be enough.
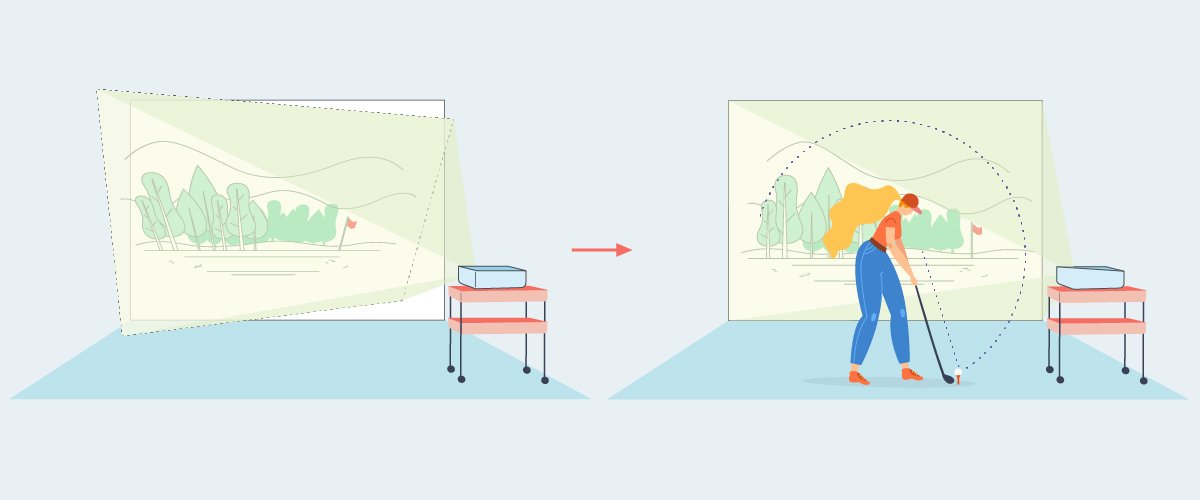
Obviously, the actual conditions for every installation might be more complicated than the examples above, and the solutions described may not be able to resolve all issues, but one thing that’s for sure is that keystone correction and Corner Fit are vital tools that will help provide you greater flexibility when installing your golf simulator.
Possible Side Issues with Keystone Correction
Even though keystone correction can help increase the flexibility one has when installing a projector, it does somewhat result in a degradation of the image. Why is this? You can think of it this way, keystone correction squeezes the original pixels in the trapezoidal image into a smaller space, which invariably leads to some minor loss.
In the illustrated example below, you can see that when an image is projected from an off-axis projector and subsequently corrected, the actual image ends up utilising only a percentage of the total projected light/pixels (with the remaining light being wasted in black space), as opposed to using the full amount of available light/pixels when the projector is aligned correctly. This is the loss we are talking about.
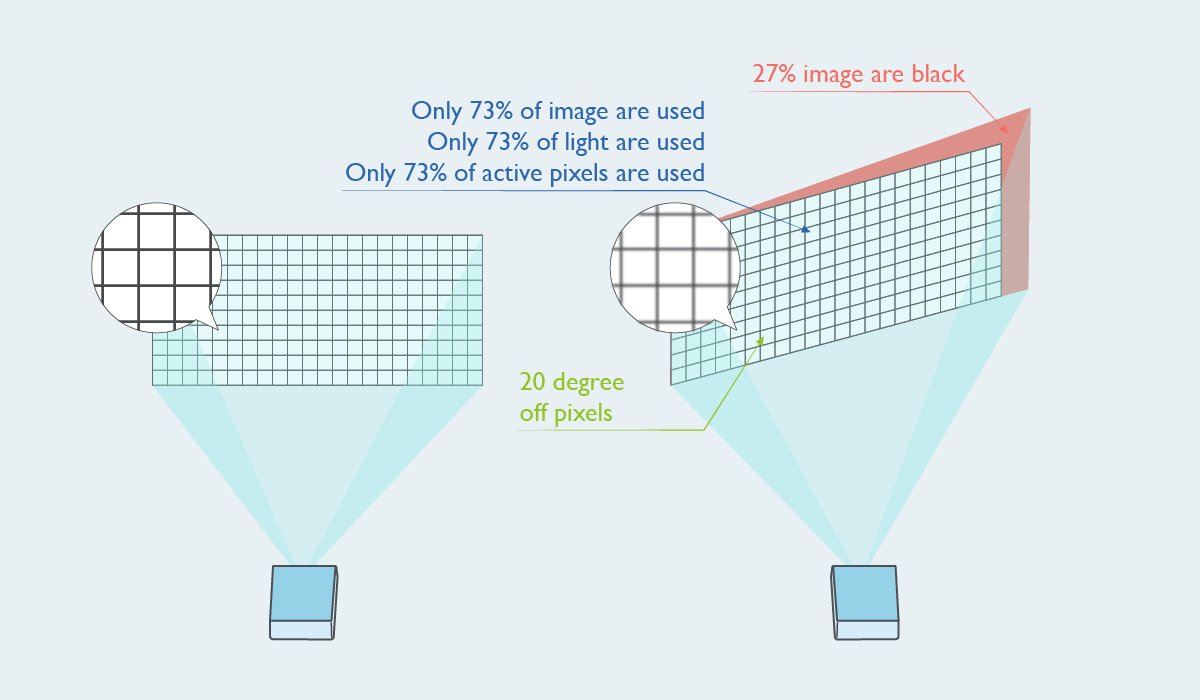
What this points to is that all forms of digital image adjustments are double-edge swords, whereas some might be able to accept some level of image degradation (or even are not able to notice it), others might think that by lessening details like the grass on the golf course, such image adjustments will affect how they are able to practice their judgement on the greens. With each person having varying standards, one has to find the sweet spot in terms of the level of image adjustment needed and the degree of detail that’s acceptable.
Another point to keep in mind regarding this issue is that the level of pixel loss due to keystone correction is less pronounced in projectors with a higher resolution. This is because a higher resolution by definition means a larger number of pixels for the image to work with. So, whereas a certain number of pixels lost in a full HD image might be noticeable, it will be much less so on a 4K image that features four times the pixels.
BenQ LK954ST Awarded ProjectorCentral InfoComm 2021 Best of Show
The following features make BenQ’s LK954ST an ideal projector for creating your home golf simulator:
- 4K resolution – With 3840 x 2160 resolution that is four times that of 1920 x 1080 Full HD, LK954ST guarantees the most pristine images.
- 3D Keystone correction – Allows you to correct image distortions along all three axes. Coupled with Corner Fit, LK954ST is able to resolve all types of installation issues.
- Short-throw ratio of 0.81 to 0.89 – In general a distance of 2.5 to 3.5m from the projection screen is ideal for your golf swing while paired with a projection screen of 3 to 4m width, all of which makes the LK954ST’s throw ratio just perfect.
Combining a short throw ratio, 4K resolution, 3D keystone correction, along with a customised golf mode to further fine-tune its visuals for the sport, the LK954ST should be your first choice when building a home golf simulator.
BenQ has trained staff to help you find the perfect golf simulator projector – within your room size and budget. To help you make the best decision, you can reach out to one of our experts to set up anything from a chat to a complete online demo, to help you find the right projector for your needs.
You may also like
-
Golf Simulator Projector Resources
Why Get a Golf Simulator and What Do You Need to Set One Up?
For the golf simulator setup, here we’re going to explore the most important things to look for when doing your research before committing to a purchase.
-
Golf Simulator Projector Resources
How to Pick the Right Golf Simulator Projector?
What to look for in a projector when choosing the perfect one for your golf simulator
-
Golf Simulator Projector Resources
Golf Simulator Set up Tip for Right and Left-Handed Golfers
Here are tips to set up a golf sim for seamless right and left-handed use, a launch monitor, a screen, and a projector that displays your shot on a widescreen.
-
Golf Simulator Projector Resources
Choose the Launch Monitor and Projector Based on Your Space
You need to choose the right launch monitor and projector perfect for your golf simulator space and setup.
-
Golf Simulator Projector Resources
Switching Aspect Ratios with BenQ’s Screen Fill Feature
What is Screen Fill feature? And how it can help golfers to quickly switching projector aspect ratios in their home golf theater? Read more about the feature.
-
Golf Simulator Projector Resources
What Is the Best Place to Mount a Golf Simulator Projector?
A guide to help understand where and why projectors are placed in front or overhead in a Golf Simulator setup